Showing posts with label install. Show all posts

Saturday, 15 March 2014

How To Install Google Services In Nokia Normandy X, X+ and XL


Before You Begin:
  • This method is only for Nokia Normandy X, X+ and XL.
  • Make sure your device is rooted. Click Here for Rooting method.
  • Enable USB Debugging on your device.Click Here if you don’t know how to enable.
  • You device must be charged 50% minimum.
  • Make a Backup of all your important data stored in device.

Download Required Files:
How To Install Google Services In Nokia Normandy X, X+ and XL:
  • Make sure your device is rooted and USB Debugging is enabled.
  • Download and Install Root Explorer in your device.
  • Now, Extract and Copy all apks from NokiaX_Gapps_KashaMalaga_28.02.2014.zip to /system/app.
  • Change Permissions of all this copied files as shown in picture:
permissions
  • After changing the permissions of all this files, reboot your device.
  • After reboot, Extract all files from NokiaX_SomeGoogleApps.zip and install apps normally.
That's it!! Congrats Google services are successfully installed in your Nokia Android smartphone.

Monday, 13 January 2014

How to Root and Instal CWM Recovery on HTC One XL/AT&T HTC One X.

HTC One XL is basically AT & T HTC X, today we shall guide you on how to install CWM on HTC X AT & T or HTC One XL. There is also the Super SU available for HTC One XL / AT & T HTC X, ROM manager is also great to use on this smartphone and today local is very important for the HTC One XL users as its very hard to find something about the HTC One XL. It took me 4 days to find Super SU and CWM recovery for HTC One XL.
In following article we shall guide you step by step how to install CWM recovery on your HTC One XL / HTC X AT & T. before we started the make sure the battery of your smartphone is more than 80% charged, and you backup your call and message data.


Note :

  • Your HTC One XL/HTC One X AT&T must be running android 4.1.2 jelly bean .
  • Enable USB Debugging Mode by go to Settings>Developers Options >Check USB Debugging Mode.
  • This guide is only for HTC One XL.

How To Root and Install CWM Recovery on HTC One XL/AT&T HTC One X.

  1. First of all unlock bootloader of your smartphone 
  2. Make sure Fastboot/ADB ic installed on your PC.
  3. Download Super SU and CWM for HTC One XL.
  4. Now copy CWM Recovery image to fastboot folder and rename it Recovery. 
  5. Turn off your smartphone and then press and hold Volume Down+Power button , when the soft keys blink 6 times release the power button , keep holding volume down button.
  6. Connect your smartphone with PC.
  7. Open fastboot folder and then hold Shift Key and press Right click , command prompt will open.
  8. Type the following command in command prompt :fastboot flash recovery recovery.img
  9. After the process is done , select Reboot Bootloader. 
  10. Now select Recovery from Bootloader.
  11. When Recovery is open select following.
  12. Now select ‘Install zip from sd card’, then select ‘choose zip from sd card’.
  13. Select the Super SU.zip file and confirm installation.
  14. After that Go back and reboot smartphone .
  15. After reboot open App Drawer to check for Super SU App to verify Root Access.

How To Install Android 4.3 Jelly Bean on Samsung Galaxy S3 GT-I9300

Samsung Galaxy S3 released almost half a year and still Samsung launches Android firmwares update for the Samsung Galaxy S3. Android 4.3 jelly bean for the Samsung Galaxy S3 was launched via OTA you will immediately receive a notification of the OTA to update the firmware but if you do not want to wait for the OTA update to accept you can manually update the Samsung Galaxy S3 on Android 4.3 jelly bean. At this time we will guide you how to install Android 4.3 jelly bean on your Samsung Galaxy S3. In today's tutorial we will be using ODIN if you do not know how to use ODIN first read about how to use Odin then continue with this tutorial. Before we start make sure that the battery of your Samsung Galaxy S3 is charged more than 80% and you have a copy of all records of calls and messages and contacts. Because this method will erase all data on your smartphone.
Note : ”We shall not held responsible if you brick your smartphone using this tutorial or any other damage caused to your smartphone , please follow each step don’t skip any step “.
Important Things :
Enable USB Debugging Mode Battery level must be 80% or more This guide is for Sprint Galaxy S3 only EFS
Download Links:
Unbranded Firmwares, can be installed on an Unlocked Galaxy S3.

Download ODIN
  • ODIN v3.07, v3.06, v3.04, v1.85, v1.83 Download From Here
  • ODIN MUTLI DOWNLOADER ALL 4.XX VERSIONS Download From Here
  • SAMSUNG USB DRIVERS 1.5.20.0 NEEDED FOR ODIN Download From Here
  • ADB & FASTBOOT TOOLS Download From Here
Download USB drivers For Samsung Galaxy S3
samsung-galaxy-s3-hands-on-15

How To Install Android 4.3 Jelly Bean on Samsung Galaxy S3 GT-I9300.??
  1. Download any of the above firmware and extract files to your PC .
  2. Turn Off your Samsung Galaxy S3 and turn on in download mode by holding Volume down+Home and Power button , when smartphone starts use volume up to continue .
  3. Open ODIN and connect your device while its in download mode.
  4. When your smartphone connects with ODIN the ODIN port will turn yellow with COM port number .
  5. Now click PDA and select the file with .tar extension.
  6. In Odin check Auto Reboot and F.Reset options .
  7. Click Start and wait for the process to complete.
  8. When the process is completed wait for your smartphone to turn on and when home screen appears unplug your smartphone .
  9. Now you have Android 4.3 jelly bean installed on your smartphone enjoy.

How to Install P605MUBUBMJ5 4.3 Jelly Bean Firmware On SMP605M Galaxy Note 10.1 LTE 2014

Download and install the latest P605MUBUBMJ5 4.3 Jelly Bean Official Firmware on Samsung Galaxy Note 10.1 LTE SM-P605M (2014 Edition). Samsung has just launched the firmware. This new device released by Samsung with Android 4.3 you can JB and this latest update of Android 4.3 Jelly Bean UBUBMJ5 regular firmware. Follow the tutorial below to install the firmware manually via Odin. You can check for the latest firmware available for your device via OTA (over the air) from Settings-About Tablet-Software Update.

As the Galaxy Note 10.1 LTE P605M released with the Android 4.3 Jelly Bean, you can expect few bug fixes and performance enhancements with this latest update. It is always recommended to update your device to the latest firmware available to keep updated with the latest security changes....

If you do not know, Android 4.3 Jelly Bean is equipped with many new features and changes from previous versions of android-like Multi-page feature on the lockscreen, support widget on the lockscreen, Tabbed UI in the Settings, Daydream feature, voice control feature to applications such as tablets, cameras, music players and so on, Hands-free mode, New Notification Panel with 2 pages, ANT + support, TRIM support, camera Repair, Move app to SD feature, New for for Samsung keyboard, Changed the icon for multiple applications for for Samsung, TouchWiz Fine, featuring Adapt, Adapt voice, full-screen mode for for Samsung apps and more.

So, want to update your LTE Galaxy Note 10.1 P605M to UBUBMJ5 latest Android 4.3 Jelly Bean firmware? To install the official way, you can go to the OTA update as mentioned above or download and install the firmware via Samsung Kies utility for. However, if you prefer the manual way to update the official firmware, then follow this article to find step-by-step user guide for Android 4.3 update UBUBMJ5 latest firmware on your Galaxy Note 10.1 LTE P605M via Odin.


Important Note:


"The firmware is released only for the Samsung Galaxy Note 10.1 LTE SM-P605M model, so don’t try this in any other android device. Check your device model number from Settings-About Tablet. Also the tutorial is based on Windows PC. Follow all the pre-requisites, procedures and steps carefully to avoid breaking your Tablet".


Android 4.3 Jelly Bean P605MUBUBMJ5 Official Firmware Download List

Samsung rolled out the firmware for the following countries. The firmware which are unbranded or not locked to any carrier, no matter of which country or region, can be flashed on any Galaxy Note 10.1 LTE SM-P605M model.
[Firmware for rest of the countries and carrier will be added here when available]


More Recent Firmware Build


Pre-Requisites:

Check battery percentage, your device should have at least 90% battery power
Turn on USB Debugging mode, go to Settings-Developer Options-USB Debugging
Backup important data and settings to external storage follow this guide
Install USB driver for your device on your computer- Download Samsung USB Driver


Points to be noted:
  • If you are using any Custom ROM such as- CyanogenMod, Paranoid Android, AOKP, SLIM ROMs etc, then it’ll replaced by this official Stock ROM
  • Custom Recovery (CWM or TWRP Recovery) will be replaced by Stock Recovery
  • After flashing official firmware, your device will no longer belongs to rooted device. However you can root your device any time after flashing the firmware.
All the above pre-requisites are very important and must follow before proceed to installation guide. Hope you get all the above points. Now, go through the below tutorial to install Android 4.3 P605MUBU
BMJ5 official firmware on Galaxy Note 10.1 LTE P605M.

How to Install Android 4.3 Jelly Bean Official Firmware on Galaxy Note 10.1 LTE P605M through Odin:

  1. Download Android 4.3 UBUBMJ5 Firmware for Galaxy Note 10.1 LTE P605M from the above list
  2. Download Odin 3.07
  3. Switch off your Tablet and boot Galaxy Note 10.1 LTE P605M into Download Mode by pressing and holding the Volume Down and Power keys together until you get the warning message, now press Volume Up key to proceed to Download Mode.
  4. Extract the downloaded Odin3.07 zip file and run the Odin3 v3.07.exe file as an administrator (Right click on the .exe file and click on Run as administrator)
  5. Now connect your Galaxy Note 10.1 LTE P605M to your computer via USB cable
  6. In Odin3 screen, you should see a COM Port number like “0:[COM7]” at ID:COM section and “Added!” text at the message box. This means your device has been detected by Odin3.
  7. Make sure that, only the “Auto Reboot” and “F. Reset Time” options are checked.
  8. Now, extract the downloaded firmware zip file, you’ll find a firmware file with extension.tar.md5
  9. In Odin screen, click on PDA button (if you are using the latest Odin Version, then click on AP button instead of PDA) and select the firmware file with .tar.md5 extension (The firmware file look something like: P605MXXDLJ5_P605MODDDLI7_INU.tar.md5)
  10. Now, click on the Start button to begin the installation process, wait few moments.
  11. Once completed, you would see “PASS!” message in ID:COM port having green background
  12. Your Tablet should automatically reboot after completion
  13. You can now disconnect your Tablet from computer
  14. Finish
That's all for updating firmware official Android 4.3 Jelly Bean on the Galaxy Note 10.1 LTE BC-P605M. Hope you get all the above points and successfully completed the tutorial. If you follow everything as mentioned in the tutorial above, then you P605M LTE Galaxy Note 10.1 should now be running on Android 4.3 Jelly Bean version UBUBMJ5 latest build. You can verify the details of the firmware update from Settings-About Tablet. If you have any questions or problems with the download link, do not hesitate to contact with us and do not forget to share your thoughts in the comments below.

How to Install E270SKSUAMJ1 4.1.2 Jelly Bean Firmware for SHVE270S Galaxy Grand

For Samsung SHV-E270S Galaxy Grand (South Korea) users can update their devices to the latest Android 4.1.2 official firmware KSUAMJ1 Jelly Bean. Samsung has just launched the firmware. E270SKSUAMJ1 latest firmware build version. The Galaxy Grand is a good low-budgeted feature for Galaxy Smartphones by Samsung, released with Android 4.1.2 Jelly Bean. The device has received the Jelly Bean Android 4.1.2 official firmware updates regularly and this is the latest firmware available. If you have not yet updated the device and the latest firmware, then update your device using our simple tutorial below. You can check for the latest firmware available for your device via OTA (over the air) from Settings-About Phone-Software Update.

As Grand E270S Galaxy already running on Android 4.1.2 Jelly Bean, you can only expect a few bug fixes and performance improvements with this latest update. So, want to update to the latest E270S Galaxy Grand KSUAMJ1 Jelly Bean Android 4.1.2 firmware? To install the official way, either you can go for the OTA update as mentioned above or download the firmware via Samsung Kies utility for. However, most of us prefer the manual way to update the official firmware. So, in this article you will find step by step user guide for the Android 4.1.2 update KSUAMJ1 latest firmware on your Galaxy Grand E270S via Odin.


Important Note:

"The firmware is released only for the Samsung Galaxy Grand SHV-E270S model, so don’t try this in any other android device. Check your device model number from Settings-About Phone. Also the tutorial is based on Granddows PC. Follow all the pre-requisites, procedures and steps carefully to avoid breaking your phone".Android 4.1.2 
Jelly Bean E270SKSUAMJ1 Official Firmware Download List
Pre-Requisites:
  • Check battery percentage, your device should have at least 60% battery power
  • Turn on USB Debugging mode, go to Settings-Developer Options-USB Debugging
  • Backup important data and settings to external storage follow this guide
  • Install USB driver for your device on your computer- Download Samsung USB Driver

Points to be noted:
  • If you are using any Custom ROM such as- CyanogenMod, Paranoid Android, AOKP, SLIM ROMs etc, then it’ll replaced by this official Stock ROM
  • Custom Recovery (CWM or TWRP Recovery) will be replaced by Stock Recovery
  • After flashing official firmware, your device will no longer belongs to rooted device. However you can root your device any time after flashing the firmware.
All the above pre-requisites are very important and must follow before proceed to installation guide. Hope you get all the above points. Now, go through the below tutorial to install Android 4.1.2 E270SKSUAMJ1 official firmware on Galaxy Grand E270S.

How to Install Android 4.1.2 Jelly Bean Official Firmware on Galaxy Grand E270S through Odin:


  1. Download Android 4.1.2 KSUAMJ1 Firmware for Galaxy Grand E270S from the above list
  2. Download Odin 3.07
  3. Switch off your phone and boot Galaxy Grand E270S into Download Mode by pressing and holding the Volume Down+Home+Power buttons (long press until the boot screen appear), now press Volume Up key to proceed to Download Mode.
  4. Extract the downloaded Odin3.07 zip file and run the Odin3 v3.07.exe file as an administrator (Right click on the .exe file and click on Run as administrator)
  5. Now connect your Galaxy Grand E270S to your computer via USB cable
  6. In Odin3 screen, you should see a COM Port number like “0:[COM7]” at ID:COM section and “Added!” text at the message box. This means your device has been detected by Odin3.
  7. Make sure that, only the “Auto Reboot” and “F. Reset Time” options are checked.
  8. Now, extract the downloaded firmware zip file, you’ll find a firmware file with extension.tar.md5
  9. In Odin screen, click on PDA button and select the firmware file with .tar.md5 extension(The firmware file look something like: E270SXXDLJ5_E270SODDDLI7_INU.tar.md5)
  10. Now, click on the Start button to begin the installation process, wait few moments.
  11. Once completed, you would see “PASS!” message in ID:COM port having green background
  12. Your phone should automatically reboot after completion
  13. You can now disconnect your phone from computer
  14. Finish
Congrats! You have completed the tutorial for Android 4.1.2 firmware update is officially Jelly Bean on SHV-E270S Galaxy Grand. Hope you managed to do the update process. If you follow everything as mentioned in the tutorial above, then your Galaxy Grand now be running on the latest Android 4.1.2 Jelly Bean build KSUAMJ1 version. You can confirm the details of the firmware update from Settings-About Phone. If you get stuck in a spot or find a problem with the download link, then please do not hesitate to contact with us using the comment form below.

How to Install Android 4.3 Jelly Bean E300LKLUEML1 Firmware for SHVE300L Galaxy S4 LTE

People who are waiting for all changes to the latest firmware for the Samsung Galaxy S4 SHV-E300L LTE (Korea Variant) Smartphone, can now download and install the official Android 4.3 Jelly Bean E300LKLUEML1 firmware. E300L LTE Galaxy S4 was released with Android 4.2.2 Jelly Bean and began to acquire Android 4.3 Jelly Bean since October. Incase you missed to update your device, then here we have the latest firmware for the device KLUEML1. Follow our simple tutorial below to install the firmware manually via Odin. You can check the latest firmware available for your device via OTA (over the air) from Settings-About Phone-Software Update.
If you E300L LTE Galaxy S4 already run on Android 4.3 Jelly Bean, then you can only expect a few bug fixes and performance improvements with the latest firmware update. So, want to update the Galaxy S4 to Newest KLUEML1 E300L LTE Android 4.3 Jelly Bean firmware? To install the official way, either you can go for the OTA update as mentioned above or download the firmware via utility for Samsung Kies. However, most of us prefer the manual way to update the official firmware. So, in this article you will enjoy the step by step user guide update of Android 4.3 KLUEML1 latest firmware on your Galaxy S4 E300L LTE via ODIN.


Important Note:

"The firmware is released only for the Samsung Galaxy S4 LTE SHV-E300L model, so don’t try this in any other android device. Check your device model number from Settings-About Phone. Also the tutorial is based on Windows PC. Follow all the pre-requisites, procedures and steps carefully to avoid breaking your phone".

Android 4.3 Jelly Bean E300LKLUEML1 Official Firmware Download List


Pre-Requisites:

  • Check battery percentage, your device should have at least 60% battery power
  • Turn on USB Debugging mode, go to Settings-Developer Options-USB Debugging
  • Backup important data and settings to external storage- follow this guide
  • Install USB driver for your device on your computer- Download Samsung USB Driver

Points to be noted:

  • If you are using any Custom ROM such as- CyanogenMod, Paranoid Android, AOKP, SLIM ROMs etc, then it’ll replaced by this official Stock ROM
  • Custom Recovery (CWM or TWRP Recovery) will be replaced by Stock Recovery
  • After flashing official firmware, your device will no longer belongs to rooted device. However you can root your device any time after flashing the firmware.
All the above pre-requisites are very important and must follow before proceed to installation guide. Hope you get all the above points. Now, go through the below tutorial to install Android 4.3 E300LKLUEML1 official firmware on Galaxy S4 LTE E300L.
How to Install Android 4.3 Jelly Bean Official Firmware on Galaxy S4 LTE E300L through Odin:

  1. Download Android 4.3 KLUEML1 Firmware for Galaxy S4 LTE E300L from the above list
  2. Download Odin 3.07
  3. Switch off your phone and boot Galaxy S4 LTE E300L into Download Mode by pressing and holding the Volume Down+Home+Power buttons (long press until the boot screen appear), now press Volume Up key to proceed to Download Mode.
  4. Extract the downloaded Odin3.07 zip file and run the Odin3 v3.07.exe file as an administrator (Right click on the .exe file and click on Run as administrator)
  5. Now connect your Galaxy S4 LTE E300L to your computer via USB cable
  6. In Odin3 screen, you should see a COM Port number like “0:[COM7]” at ID:COM section and “Added!” text at the message box. This means your device has been detected by Odin3.
  7. Make sure that, only the “Auto Reboot” and “F. Reset Time” options are checked.
  8. Now, extract the downloaded firmware zip file, you’ll find a firmware file with extension.tar.md5
  9. In Odin screen, click on PDA button and select the firmware file with .tar.md5 extension(The firmware file look something like: E300LXXDLJ5_E300LODDDLI7_INU.tar.md5)
  10. Now, click on the Start button to begin the installation process, wait few moments.
  11. Once completed, you would see “PASS!” message in ID:COM port having green background
  12. Your phone should automatically reboot after completion
  13. You can now disconnect your phone from computer
  14. Finish
Congratulations! You E300L LTE Galaxy S4 is now updated to Android 4.3 Jelly Bean and the latest official firmware. Hope you managed to do the update process. If you follow everything as mentioned in the tutorial above, then you you LTE Galaxy S4 should now be running on the latest Android 4.3 Jelly Bean build KLUEML1 version. You can confirm the details of the firmware update from Settings-About Phone. If you find a problem with the above tutorial and download link, please do not hesitate to contact with us using the comment form below ..

How to Install N900PVPUBMJ4 4.3 Jelly Bean Firmware On SMN900P Sprint Galaxy Note 3

Sprint Samsung Galaxy Note 3 BC-N900P (USA) users can now update their devices to Android 4.3 firmware VPUBMJ4 official Jelly Bean which is being launched by Samsung. The latest firmware version N900PVPUBMJ4 built. The device that was released with Android 4.3 Jelly Bean and has been getting regular firmware updates. If you still need to update your device then update the latest official firmware N900PVPUBMJ4 Android 4.3 Jelly Bean on Sprint's Galaxy Note 3. You can check the latest firmware available for your device via OTA (over the air) on your phone settings, go to Settings-General-About-Software Update.

For Samsung Galaxy Note 3 N900P comes with Android 4.3 Jelly Bean, you can only expect some additional bug fixes and performance improvements in this update. It is always recommended to update your device to the latest firmware when available.

If you do not already know, Android 4.3 Jelly Bean is equipped with many new features of Android Jelly Bean as the previous 4.2.2 Multi-page feature on the lockscreen, support widget on the lockscreen, Tabbed UI in the Settings, Daydream feature, voice control features for application such as mobile phones, cameras, music players and so on, Hands-free mode, New Notification Panel with 2 pages, ANT + support, TRIM support, camera Repair, Move app to SD feature, New Samsung keyboard, Changed the icon for a few Samsung apps, Fine TouchWiz, display Adapt, Adapt voice, full-screen mode in Samsung apps and more.


So, want to update to the Galaxy Note 3 N900P VPUBMJ4 latest firmware Android 4.3 Jelly Bean? There are two official ways to update the firmware, both check and update via OTA as mentioned above or download and update via Samsung Kies utility. However, if you're looking for a manual way to update the latest firmware VPUBMJ4 Android 4.3 on the Galaxy Note 3 N900P via Odin, then follow the step by step tutorial.

Important Note:
"
The firmware is released only for the Samsung Galaxy Note 3 SM-N900P model, so don’t try this in any other android device. Check your device model number from Settings-General-About. Also the tutorial is based on Windows PC. Follow all the pre-requisites, procedures and steps carefully to avoid breaking your phone".

Android 4.3 Jelly Bean N900PVPUBMJ4 Official Firmware Download List


Pre-Requisites:


  • Check battery percentage, your device should have at least 60% battery power
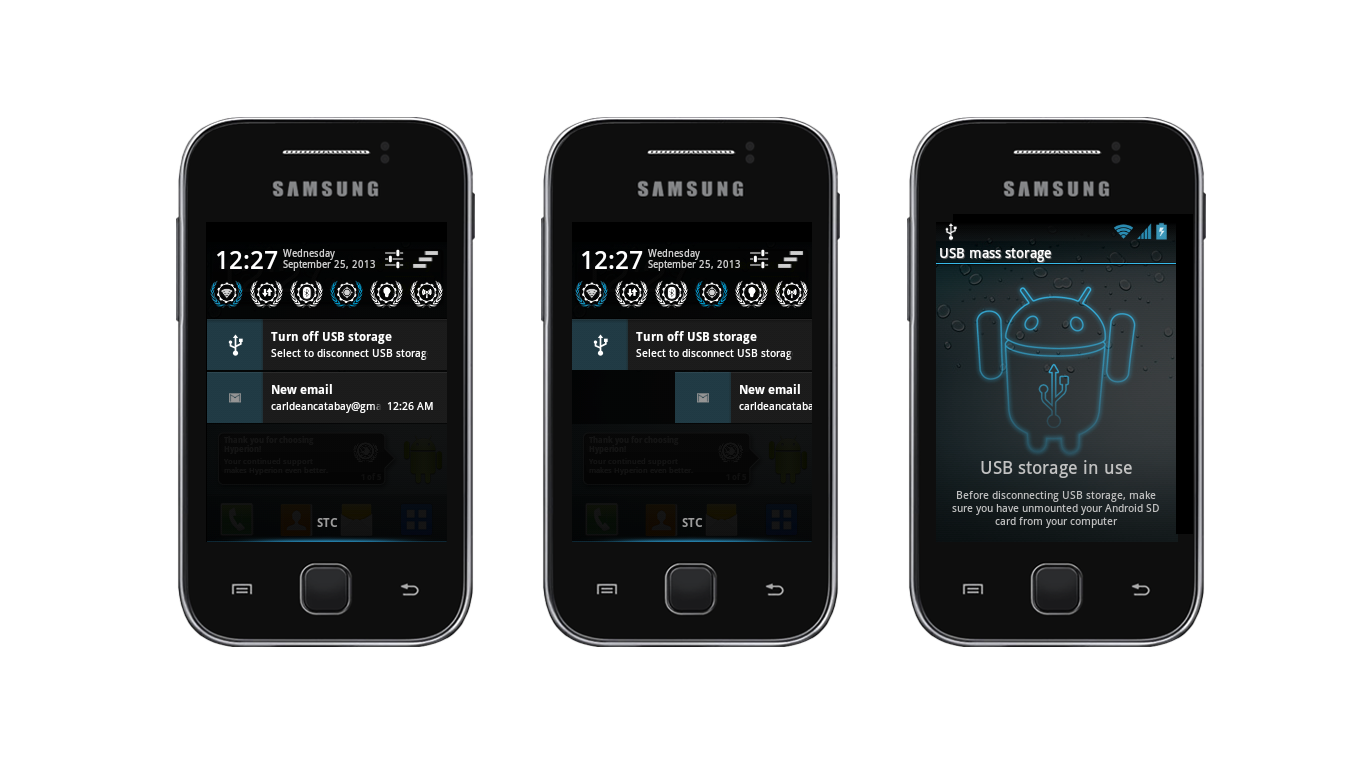
  • Turn on USB Debugging mode, go to Settings-General-Developer Options (As the Developer options are hidden by default on all Android device running on Android 4.2 or up, So go to Settings-General-About on your Galaxy Note 3 and tap Build Number for 7 times to visible the Developer options.) See the image above
  • Backup important data and settings to external storage- follow this guide
  • Install USB driver for your device on your computer- Download Samsung USB Driver

Points to be noted:

  • If you are using any Custom ROM such as- CyanogenMod, Paranoid Android, AOKP, SLIM ROMs etc, then it’ll replaced by this official Stock ROM
  • Custom Recovery (CWM or TWRP Recovery) will be replaced by Stock Recovery
  • After flashing official firmware, your device will no longer belongs to rooted device. However you can root your device any time after flashing the firmware.
All the above pre-requisites are very important and must follow before proceed to installation guide. Hope you get all the above points. Now, go through the below tutorial to install Android 4.3 N900PVPUBMJ4 official firmware on Galaxy Note 3 N900P.
How to Update Android 4.3 Jelly Bean Official Firmware on Galaxy Note 3 N900P via Odin:

  1. Download Android 4.3 VPUBMJ4 Firmware for Galaxy Note 3 N900P from the above list
  2. Download Odin 3.07
  3. Switch off your phone and boot Galaxy Note 3 N900P into Download Mode by pressing and holding the Volume Down+Home+Power buttons (long press until the boot screen appear), now press Volume Up key to proceed to Download Mode.
  4. Extract the downloaded Odin3.07 zip file and run the Odin3 v3.07.exe file as an administrator (Right click on the .exe file and click on Run as administrator)
  5. Now connect your Galaxy Note 3 N900P to your computer via USB cable
  6. In Odin3 screen, you should see a COM Port number like “0:[COM7]” at ID:COM section and “Added!” text at the message box. This means your device has been detected by Odin3.
  7. Make sure that, only the “Auto Reboot” and “F. Reset Time” options are checked.
  8. Now, extract the downloaded firmware zip file, you’ll find a firmware file with extension.tar.md5
  9. In Odin screen, click on PDA button and select the firmware file with .tar.md5 extension(The firmware file look something like: N900PXXDLJ5_N900PODDDLI7_INU.tar.md5)
  10. Now, click on the Start button to begin the installation process, wait few moments.
  11. Once completed, you would see “PASS!” message in ID:COM port having green background
  12. Your phone should automatically reboot after completion
  13. You can now disconnect your phone from computer
  14. Finish
Congrats! you have done. Hope you successfully complete tutorial to update the firmware of Android 4.3 Jelly Bean officially VPUBMJ4 on Galaxy Note 3 BC-N900P. If you've followed everything in the tutorial as mentioned above, then your device should now be running on the latest Android 4.3 Jelly Bean VPUBMJ4 build version. You can verify the details of the firmware update from the Settings-General-About. If you have any questions, please feel free to contact with us using the comment form below and also share how you found the tutorial.

Sunday, 12 January 2014

How to Instal Custom ROM Hyperion Final di Galaxy Young GT S5360

How to Install Custom ROM in Galaxy Y Hyperion Final GT S5360 - Previously, Hyperion is a Custom ROM developed by CarlDeanCatabay a senior member at XDA. This ROM could be one option for your Samsung Galaxy Young S5360 of the many available Cusrom fatherly this device, Hyperion already has a remarkable stability and have features that are fairly complete also look quite attractive it will be suitable for use in day-to-days. The feature can be read in the thread XDA

Currently Hyperion has entered the final version which probably will not be updated anymore because now it is very rare to find bugs in this ROM. This course builds upon the Gingerbread ROM.
Following a direct course to guide mengisntal Hyperion in Young Galaxy

How to Install Custom ROM on Galaxy Final Hyperion Young GT-S5360

Previously downloaded file2 required from the forum thread at XDA. All you need is download the Hyperion ROM in the first post, Temporary files and Hyperion CWM RIL FIX is in the 4th post after you download all the files on the SD card move.

Backup all your important data!

Make sure all that you have done fatherly need to proceed to the next stage

Step by step install Hyperion in Galaxy Young:
  1. Turn off your device, then go into recovery mode press and hold the power button + home + volume up.
  2. In Recovery mode choose option install zip from sd card.
  3. Choose zip from sd card select the file TempCWM.zip wait a minute, and you will go into CWM Recovery with yellow text.
  4. Select mounts and storage option.
  5. Mount the / system, / data, cache if it is in the mount will be unmounted tertilus
  6. Press the back button, select wipe data / factory reset wipe Dalvik cache did.
  7. Press the back button and select install zip from sd card.
  8. Select the option choose zip from sd card.
  9. Find and select the file-Hyperion-08.GM FINAL.zip
  10. Log in again to mounts and storage
  11. Mounting again / system, / data, cache
  12. Back, select install zip from sd card then Choose zip from sd card.
  13. Find and select the file-Hyperion-08.GM RIL.FIX.zip
  14. Back and select reboot sytem now.
Congratulations you have successfully installed the Hyperion ROM in Galaxy Y, the first boot process will take a little longer than usual.

How to Install CM 11 Android 4.4 Kit-Kat On Your Xperia Sola (Guide)

In this alticel I will show you How to Install CM 11 4.4 Kit-Kat On Xperia Sola. Although that Sony released a list of smartphones, it will receive updates from Kit-Kat Android 4.4, but OTA will start rolling until February 2014. But it is not clear that the Sony Xperia Sola will get the Android 4.4 update or not. Well, if you're tired of waiting, then you can try an alternative solution, and then install a custom ROM based on 4.4 Kit-Kat. 
In this prses Make sure that you have a charged battery is more than 65% and have backed up all your important contacts, call log and message as well. So, it is advisable in any case of accident or loss of data to back up all your important data.


Disclaimer:
As the method involved in flashing a custom ROM and then rooting your phone and custom high can cause bricking your phone, and it has nothing to do with Google or manufacturer Sony devices in our case. In the event of a major accident we may not be responsible. So follow these instructions to words to avoid accidents or bricking. So make sure that whatever you do, do it all on your own responsibility.


Important things:

  • Your phone must be Rooted and Latest TWRP or CWM Recovery must be installed on it.
  • Make Sure that the USB Cable is not Connected With PC While The Installation in Process.
  • Enable USB debugging mode.
  • Make sure that battery level is at 85% or more.
  • This Tutorial is Only For your Xperia Sola.
  1. Download latest Android 4.4 KitKat CM11 ROM – Link #1
  2. Download Google Apps for Android 4.4 CM11(includes Gmail, Play Store, Play Music..) –pa_gapps-full-4.4-20131119-signed.zip (Mirror #1Mirror #2)
  • Disconnect the cable.
  • Turn Off tablet.
CWM Recovery Users.
  • Turn off phone and then open Recovery mode. How? Press and then hold Volume Downs+ Power buttons until you see text on screen.
  • First Chose ‘Wipe Cache’.
  • Then Navigate to ‘advance’ and then choose ‘Devlik Wipe Cache’ so you won’t get in bootloop.
  • Now finally select ‘Wipe Data/Factory Reset’.
  • Navigate to ‘Install the zip from sd card’ another window will open in front of you.
  • Select ‘choose zip from the sd card’ from Options.
  • Select Android 4.4 file and then confirm the installation on next screen.
  • Wait for process to over, now Choose the Google Apps instead of Android 4.4, to install Google Apps.
  • Navigate‘++++++++ Go Back‘ to return to the previous screen.
  • Then choose the “reboot system now’ to reboot your device.

TWRP Users.

  • Tap on Wipe Button and then Select System, Data and Cache.
  • Swipe Confirmation Slider.
  • Go back to the Main Menu and Tap Install Button.
  • Locate Android 4.4 and the Google Apps, Swipe Slider To install it.
  • Finally Tap the Reboot and then System.

How To Install XXAML5 Android 4.1.2 JB Firmware on Galaxy Tab 3 7.0 (3G) SM-T211

Warning: This tutorial is only for Galaxy Tab 3 7.0 (3G) SM-T211. Don’t try this guide on any other Android device. Also, we are not responsible for any damage caused due to the instruction given in this page. Try this at your own risk. However, it is very unlikely that your device will be damaged if you follow all the instructions as it is which are mentioned in procedure.
Pre Requisites:

Though official firmware restore all existing data but we recommend to back up your data first before proceeding to avoid any uncomfortable situation such as bootloop fix.

1. Backup your device data. You can follow our ultimate backup guide.

2. Make sure your device have at least 60% battery power. You can install an app like Battery Notifier BT Free on your Android device to check it easily.

3. You already have USB Driver Installed for Galaxy Tab 3 7.0 (3G) SM-T211 in your PC. Download USB Drivers

4. Make sure USB Debugging is enabled otherwise you won’t able to transfer file between PC and Galaxy Tab 3 7.0 (3G) SM-T211.

How To Update Galaxy Tab 3 7.0 (3G) SM-T211 via OTA
  1. First of all make sure you have stable internet connection (Wi-Fi or data network) on your device.
  2. Now, go to Android app drawer and then select Settings.
  3. Then locate About Device and tap on it.
  4. Next select Software update from About device screen.
  5. Then tap on Update option.
  6. You should see an update, press OK to download and install. (Remember, download using 3G or network data will incur additional charges to your phone bill!)
  7. Soon your device will reboot to complete the installation process.
If you see “The latest update have already been installed” massage while checking update then your device yet to receive an OTA update. Check back within few days or jump to next procedure.

How To Update Galaxy Tab 3 7.0 (3G) SM-T211 via Kies
  1. Make sure you have stable internet connection on your computer.
  2. Now download and install Samsung Kies on your computer.
  3. Turn on your device (if it off) and then connect it to computer with USB cable.
  4. Run Samsung Kies and wait for it to detect your device.
  5. You should see a New Firmware Upgrade is available at Samsung Kies home screen.
  6. Press the Firmware Upgrade button to proceed.
  7. Follow on screen instruction and soon you will see your device running upgrade and reboot automatically. Once done, you can disconnect your device from computer.
Again! If you see “This is the latest firmware” in Samsung Kies, then your device yet to receive the latest update on Kies. Its good time to go for manual update instruction that located below.

T211XXAML5 Android 4.1.2 Jelly Bean Firmware Details:
Please Note: After flashing this firmware you will lost any installed custom ROM including CM10.2, AOKP, Avatar,Beanstalk, Omni ROM, Slim ROM, Pac-Man, Paranoid Android, LiquidSmooth or Carbon.

How To Install T211XXAML5 Android 4.1.2 Jelly Bean On Galaxy Tab 3 7.0 (3G) SM-T211 Manually
  1. Download Odin v3.09.
  2. Extract Firmware zip file that you downloaded earlier from above link, you will get a .tar.md5 file and some other files (optional).
  3. Extract Odin zip file and you will get Odin3 v3.09.exe along with few other files.
  4. Power off your Android device. Wait 5-6 seconds for vibration to confirm complete switch off.
  5. Now, put the Galaxy Tab 3 7.0 (3G) SM-T211 in Download Mode by pressing and holding down the Volume Down button and the Power button together. A warning screen will come up; press Volume Up button to enter Download Mode.
  6. Now run Odin3 v3.09.exe (see Step 3) as an Administrator because Admin privileges is required to complete the process smoothly (only applicable Windows Vista and higher).
  7. Now connect your device to your PC using USB cable. An “Added!!” massage will appear in Odin’s message box. If you don’t get the same then you should try another USB port (try USB port located in back in your desktop PC). If that too don’t work then you should reinstall the driver. If you successfully see the “Added!!” message in Odin then you are ready to go in next step. You should also see COM port with a number in Yellow if you successfully added your device.
  8. Click the AP Button, and select that .tar.md5 file that you get in Step 2. If you are using old Odin then add the file to PDA button.
  9. In Odin window, make sure only Auto Reboot and F. Reset Time checkboxes are selected.
  10. Double check everything that we mentioned in Step 8 & Step 9 above. Now, once satisfied hit the START button to begin the flashing process.
  11. Once flashing completed, your Galaxy Tab 3 7.0 (3G) SM-T211 will restart and soon you will see a PASS message with green background in the left-most box at the very top of the Odin. You can now unplug the USB cable to disconnect your device from computer.
Congrats! You just updated your Galaxy Tab 3 7.0 (3G) SM-T211 to Android 4.1.2 Jelly Bean firmware. Go toSettings > About device to verify this firmware update.

Fix Boot Loop Issue On Galaxy Tab 3 7.0 (3G) SM-T211

If Galaxy Tab 3 7.0 (3G) SM-T211 stuck at booting animation for more than 10 minutes after Step 11 then follow below instructions:
  1. Go to recovery mode. To do so, press and hold the Volume Up and Power buttons together.
  2. Now perform Wipe data/Factory Reset and Wipe Cache Partition task before selecting reboot system now function. In recovery mode use Volume keys to navigate between options and Power key to select the option.
Please note, performing wiping task will erase your device internal memory data and not external SD card data.

That’s it! Let us know about your latest Android 4.1.2 Jelly Bean experience.

Saturday, 11 January 2014

How To Install XWUGML4 Android 4.3 JB Official Firmware on Galaxy S3 I9300 - Guide

Samsung launches Android 4.3 Jelly Bean XWUGML4 official firmware update for the Galaxy S3 GT - I9300. The firmware update is launched in various countries including India, and also can be downloaded for manual updates. Galaxy S3 GT - I9300 comes with Android 4.0.4 ICS is then updated to Android 4.1.2 Jelly Bean and now's your chance to upgrade to Android 4.3 Jelly Bean.

Android 4.3 Jelly Bean I9300XWUGML4 stock firmware available in both OTA and Kies update. However, if you can not get it from there then you can always blink I9300XWUGML4 Android 4.3 Jelly Bean firmware on Galaxy S3 GT - I9300 manual. We will discuss all the methods available updates. You should always try OTA or Kies method when the first and second method does not work then just try flashing manually.

Warning: This tutorial is only for Galaxy S3 GT-I9300. Don’t try this guide on any other Android device. Also, we are not responsible for any damage caused due to the instruction given in this page. Try this at your own risk. However, it is very unlikely that your device will be damaged if you follow all the instructions as it is which are mentioned in procedure.
Pre Requisites:

Though official firmware restore all existing data but we recommend to back up your data first before proceeding to avoid any uncomfortable situation such as bootloop fix.

1. Backup your device data. You can follow our ultimate backup guide.
2. Make sure your device have at least 60% battery power. You can install an app like Battery Notifier BT Free on your Android device to check it easily.

3. You already have USB Driver Installed for Galaxy S3 GT-I9300 in your PC. Download USB Drivers

4. Make sure USB Debugging is enabled otherwise you won’t able to transfer file between PC and Galaxy S3 GT-I9300.

How To Update Galaxy S3 GT-I9300 via OTA
  • First of all make sure you have stable internet connection (Wi-Fi or data network) on your device.
  • Now, go to Android app drawer and then select Settings.
  • Then locate About Device and tap on it.
  • Next select Software update from About device screen.
  • Then tap on Update option.
  • You should see an update, press OK to download and install. (Remember, download using 3G or network data will incur additional charges to your phone bill!)
  • Soon your device will reboot to complete the installation process.
If you see “The latest update have already been installed” massage while checking update then your device yet to receive an OTA update. Check back within few days or jump to next procedure.

How To Update Galaxy S3 GT-I9300 via Kies

Make sure you have stable internet connection on your computer.
Now download and install Samsung Kies on your computer.
Turn on your device (if it off) and then connect it to computer with USB cable.
Run Samsung Kies and wait for it to detect your device.
You should see a New Firmware Upgrade is available at Samsung Kies home screen.
Press the Firmware Upgrade button to proceed.
Follow on screen instruction and soon you will see your device running upgrade and reboot automatically. Once done, you can disconnect your device from computer.

Again! If you see “This is the latest firmware” in Samsung Kies, then your device yet to receive the latest update on Kies. Its good time to go for manual update instruction that located below.

Note: You can install any firmware listed below despite availability in other countries, except those which comes with carrier name.

I9300XWUGML4 Android 4.3 Jelly Bean Firmware Downloads

[Please Note: After flashing this firmware you will lost any installed custom ROM including CM10.2, AOKP, Avatar,Beanstalk, Omni ROM, Slim ROM, Pac-Man, Paranoid Android, LiquidSmooth or Carbon

How To Install I9300XWUGML4 Android 4.3 Jelly Bean On Galaxy S3 GT-I9300 Manually

  1. Download Odin v3.09.
  2. Extract Firmware zip file that you downloaded earlier from above link, you will get a .tar.md5 file and some other files (optional).
  3. Extract Odin zip file and you will get Odin3 v3.09.exe along with few other files.
  4. Power off your Android device. Wait 5-6 seconds for vibration to confirm complete switch off.
  5. Now, put the Galaxy S3 GT-I9300 in Download Mode by pressing and holding down the Home & Volume Down button together while pressing the Power button. A warning screen will come up; press Volume Up button to enter Download Mode.
  6. Now run Odin3 v3.09.exe (see Step 3) as an Administrator because Admin privileges is required to complete the process smoothly (only applicable Windows Vista and higher).
  7. Now connect your device to your PC using USB cable. An “Added!!” massage will appear in Odin’s message box. If you don’t get the same then you should try another USB port (try USB port located in back in your desktop PC). If that too don’t work then you should reinstall the driver. If you successfully see the “Added!!” message in Odin then you are ready to go in next step. You should also see COM port with a number in Yellow if you successfully added your device.
  8. Click the AP Button, and select that .tar.md5 file that you get in Step 2.
  9. In Odin window, make sure only Auto Reboot and F. Reset Time checkboxes are selected.
  10. Double check everything that we mentioned in Step 8 & Step 9 above. Now, once satisfied hit the START button to begin the flashing process.
  11. Once flashing completed, your Galaxy S3 GT-I9300 will restart and soon you will see a PASS message with green background in the left-most box at the very top of the Odin. You can now unplug the USB cable to disconnect your device from computer.
Congrats! You just updated your Galaxy S3 GT-I9300 to Android 4.3 Jelly Bean firmware. Go to Settings > About device to verify this firmware update.

Fix Boot Loop Issue On Galaxy S3 GT-I9300

If Galaxy S3 GT-I9300 stuck at booting animation for more than 10 minutes after Step 11 then follow below instructions:
  1. Go to recovery mode. To do so, press and hold the Volume Up, Home and Power buttons together.
  2. Now perform Wipe data/Factory Reset and Wipe Cache Partition task before selecting reboot system now function. In recovery mode use Volume keys to navigate between options and Power key to select the option.
Please note, performing wiping task will erase your device internal memory data and not external SD card data.

That’s it! Let us know about your latest Android 4.3 Jelly Bean experience.

How To Install XXAMG1 Android 4.1.2 JB Firmware on Galaxy Fame S6810 - Guide

Samsung launches Android 4.1.2 firmware update XXAMG1 official Jelly Bean for Galaxy GT-S6810 Fame. The firmware update is launched in various countries including Afghanistan, Saudi Arabia, Tunisia, Pakistan, Iraq, Egypt and Morocco, and also can be downloaded for manual updates. You can also update your device firmware via Kies or OTA update. Because the device comes with Android 4.1.2 Jelly Bean out of the box, this new firmware update just brings bug fixes and performance tweaks. Continue reading this guide to learn how to get an official stock S6810XXAMG1 Jelly Bean Android 4.1.2 firmware running on the GT-S6810 Galaxy fame....


Warning: This tutorial is only for Galaxy Fame GT-S6810. Don’t try this guide on any other Android device. Also, we are not responsible for any damage caused due to the instruction given in this page. Try this at your own risk. However, it is very unlikely that your device will be damaged if you follow all the instructions as it is which are mentioned in procedure.
Pre Requisites:
Though official firmware restore all existing data but we recommend to back up your data first before proceeding to avoid any uncomfortable situation such as bootloop fix.

1. Backup your device data. You can follow our ultimate backup guide.

2. Make sure your device have at least 60% battery power. You can install an app like Battery Notifier BT Free on your Android device to check it easily.

3. You already have USB Driver Installed for Galaxy Fame GT-S6810 in your PC. [Download USB Drivers]

4. Make sure USB Debugging is enabled otherwise you won’t able to transfer file between PC and Galaxy Fame GT-S6810. 
How To Update Galaxy Fame GT-S6810 via OTA
  1. First of all make sure you have stable internet connection (Wi-Fi or data network) on your device.
  2. Now, go to Android app drawer and then select Settings.
  3. Then locate About Device and tap on it.
  4. Next select Software update from About device screen.
  5. Then tap on Update option.
  6. You should see an update, press OK to download and install. (Remember, download using 3G or network data will incur additional charges to your phone bill!)
  7. Soon your device will reboot to complete the installation process.
If you see “The latest update have already been installed” massage while checking update then your device yet to receive an OTA update. Check back within few days or jump to next procedure.

How To Update Galaxy Fame GT-S6810 via Kies
Make sure you have stable internet connection on your computer.
Now download and install Samsung Kies on your computer.
Turn on your device (if it off) and then connect it to computer with USB cable.
Run Samsung Kies and wait for it to detect your device.
You should see a New Firmware Upgrade is available at Samsung Kies home screen.
Press the Firmware Upgrade button to proceed.
Follow on screen instruction and soon you will see your device running upgrade and reboot automatically. Once done, you can disconnect your device from computer.

Again! If you see “This is the latest firmware” in Samsung Kies, then your device yet to receive the latest update on Kies. Its good time to go for manual update instruction that located below.
[Note: You can install any firmware listed below despite availability in other countries, except those which comes with carrier name.]

S6810XXAMG1 Android 4.1.2 Jelly Bean Firmware Downloads
  1. Afghanistan: S6810XXAMG1 S6810OJVAMF2_AFG.zip
  2. Saudi Arabia: S6810XXAMG1 S6810OJVAMF2_KSA.zip
  3. Tunisia: S6810XXAMG1 S6810OJVAMF2_TUN.zip
  4. Pakistan (PAK): S6810XXAMG1 S6810OJVAMF2_PAK.zip
  5. Iraq: S6810XXAMG1 S6810OJVAMF2_MID.zip
  6. Egypt: S6810XXAMG1 S6810OJVAMF2_EGY.zip
  7. Morocco (MWD): S6810XXAMG1 S6810OJVAMF2_MWD.zip
  8. Morocco: S6810XXAMG1 S6810OJVAMF2_FWD.zip

[Please Note: After flashing this firmware you will lost any installed custom ROM including CM10.2, AOKP, Avatar,Beanstalk, Omni ROM, Slim ROM, Pac-Man, Paranoid Android, LiquidSmooth or Carbon.]

How To Install S6810XXAMG1 Android 4.1.2 Jelly Bean On Galaxy Fame GT-S6810 Manually
  1. Download Odin v3.09.
  2. Extract Firmware zip file that you downloaded earlier from above link, you will get a .tar.md5 file and some other files (optional).
  3. Extract Odin zip file and you will get Odin3 v3.09.exe along with few other files.
  4. Power off your Android device. Wait 5-6 seconds for vibration to confirm complete switch off.
  5. Now, put the Galaxy Fame GT-S6810 in Download Mode by pressing and holding down the Home & Volume Down button together while pressing the Power button. A warning screen will come up; press Volume Up button to enter Download Mode.
  6. Now run Odin3 v3.09.exe (see Step 3) as an Administrator because Admin privileges is required to complete the process smoothly (only applicable Windows Vista and higher).
  7. Now connect your device to your PC using USB cable. An “Added!!” massage will appear in Odin’s message box. If you don’t get the same then you should try another USB port (try USB port located in back in your desktop PC). If that too don’t work then you should reinstall the driver. If you successfully see the “Added!!” message in Odin then you are ready to go in next step. You should also see COM port with a number in Yellow if you successfully added your device.
  8. Click the AP Button, and select that .tar.md5 file that you get in Step 2. If you are using old Odin then add the file to PDA button.
  9. In Odin window, make sure only Auto Reboot and F. Reset Time checkboxes are selected.
  10. Double check everything that we mentioned in Step 8 & Step 9 above. Now, once satisfied hit the START button to begin the flashing process.
  11. Once flashing completed, your Galaxy Fame GT-S6810 will restart and soon you will see a PASS message with green background in the left-most box at the very top of the Odin. You can now unplug the USB cable to disconnect your device from computer.
Congrats! You just updated your Galaxy Fame GT-S6810 to Android 4.1.2 Jelly Bean firmware. Go to Settings > About device to verify this firmware update.


Fix Boot Loop Issue On Galaxy Fame GT-S6810

If Galaxy Fame GT-S6810 stuck at booting animation for more than 10 minutes after Step 11 then follow below instructions:
  1. Go to recovery mode. To do so, press and hold the Volume Up, Home and Power buttons together.
  2. Now perform Wipe data/Factory Reset and Wipe Cache Partition task before selecting reboot system now function. In recovery mode use Volume keys to navigate between options and Power key to select the option.

Please note, performing wiping task will erase your device internal memory data and not external SD card data.

That’s it! Let us know about your latest Android 4.1.2 Jelly Bean experience.

How to Install Android 4.3 UBUGMK6 JB Firmware on Galaxy S3 I9300

Samsung has now launched Android 4.3 Jelly Bean is UBUGMK6 official firmware update for the Galaxy S3 GT-I9300. Updates the firmware was launched in various countries including Brazil one of them, and also can be downloaded for a manual update. This new firmware update just brings bug fixes and performance tweaks on the Galaxy S3 GT-I9300 you. Well right Keep reading this guide to learn further how to get an official stock Android 4.3 Jelly Bean I9300UBUGMK6 firmware running on the Galaxy S3 GT-I9300. Almost all possible ways in this alloy to update your device to this firmware discussed here. One thing to note that the official firmware flashing or installing the recovery kernel root access you will fail, in short it will unroot.


I9300UBUGMK6 Android 4.3 Jelly Bean firmware stok tersedia di kedua OTA dan Kies mengupdate. Namun, jika Anda tidak bisa mendapatkannya dari sana maka Anda bisa selalu menyala I9300UBUGMK6 Android 4.3 Jelly Bean firmware pada Galaxy S3 GT-I9300 manual. Kami akan membicarakan semua metode pembaruan yang tersedia. Anda harus selalu mencoba OTA atau metode Kies pertama dan ketika kedua metode tidak bekerja maka hanya mencoba flashing manual.

Warning: This tutorial is only for Galaxy S3 GT-I9300. Don’t try this guide on any other Android device. Also, we are not responsible for any damage caused due to the instruction given in this page. Try this at your own risk. However, it is very unlikely that your device will be damaged if you follow all the instructions as it is which are mentioned in procedure.


Pre Requisites:

Though official firmware restore all existing data but we recommend to back up your data first before proceeding to avoid any uncomfortable situation such as bootloop fix.

1. Backup your device data.

2. Make sure your device have at least 60% battery power. You can install an app like Battery Notifier BT Free on your Android device to check it easily.

3. You already have USB Driver Installed for Galaxy S3 GT-I9300 in your PC. Download USB Drivers

4. Make sure USB Debugging is enabled otherwise you won’t able to transfer file between PC and Galaxy 

S3 GT-I9300.How To Update Galaxy S3 GT-I9300 via OTA
  1. First of all make sure you have stable internet connection (Wi-Fi or data network) on your device.
  2. Now, go to Android app drawer and then select Settings.
  3. Then locate About Device and tap on it.
  4. Next select Software update from About device screen.
  5. Then tap on Update option.
  6. You should see an update, press OK to download and install. (Remember, download using 3G or network data will incur additional charges to your phone bill!)
  7. Soon your device will reboot to complete the installation process.
If you see “The latest update have already been installed” massage while checking update then your device yet to receive an OTA update. Check back within few days or jump to next procedure.

How To Update Galaxy S3 GT-I9300 via Kies

  1. Make sure you have stable internet connection on your computer.
  2. Now download and install Samsung Kies on your computer.
  3. Turn on your device (if it off) and then connect it to computer with USB cable.
  4. Run Samsung Kies and wait for it to detect your device.
  5. You should see a New Firmware Upgrade is available at Samsung Kies home screen.
  6. Press the Firmware Upgrade button to proceed.
  7. Follow on screen instruction and soon you will see your device running upgrade and reboot automatically. Once done, you can disconnect your device from computer.

Again! If you see “This is the latest firmware” in Samsung Kies, then your device yet to receive the latest update on Kies. Its good time to go for manual update instruction that located below.

I9300UBUGMK6 Android 4.3 Jelly Bean Firmware Details:

PDA: I9300UBUGMK6
CSC: I9300ZTOUGMK3

Please Note: After flashing this firmware you will lost any installed custom ROM including CM10.2, AOKP, Avatar,Beanstalk, Omni ROM, Slim ROM, Pac-Man, Paranoid Android, LiquidSmooth or Carbon.

How To Install I9300UBUGMK6 Android 4.3 Jelly Bean On Galaxy S3 GT-I9300 Manually
  1. Download Odin v3.09.
  2. Extract Firmware zip file that you downloaded earlier from above link, you will get a .tar.md5 file and some other files (optional).
  3. Extract Odin zip file and you will get Odin3 v3.09.exe along with few other files.
  4. Power off your Android device. Wait 5-6 seconds for vibration to confirm complete switch off.
  5. Now, put the Galaxy S3 GT-I9300 in Download Mode by pressing and holding down the Home & Volume Down button together while pressing the Power button. A warning screen will come up; press Volume Up button to enter Download Mode.
  6. Now run Odin3 v3.09.exe (see Step 3) as an Administrator because Admin privileges is required to complete the process smoothly (only applicable Windows Vista and higher).
  7. Now connect your device to your PC using USB cable. An “Added!!” massage will appear in Odin’s message box. If you don’t get the same then you should try another USB port (try USB port located in back in your desktop PC). If that too don’t work then you should reinstall the driver. If you successfully see the “Added!!” message in Odin then you are ready to go in next step. You should also see COM port with a number in Yellow if you successfully added your device.
  8. Click the AP Button, and select that .tar.md5 file that you get in Step 2.
  9. In Odin window, make sure only Auto Reboot and F. Reset Time checkboxes are selected.
  10. Double check everything that we mentioned in Step 8 & Step 9 above. Now, once satisfied hit the START button to begin the flashing process.
  11. Once flashing completed, your Galaxy S3 GT-I9300 will restart and soon you will see a PASS message with green background in the left-most box at the very top of the Odin. You can now unplug the USB cable to disconnect your device from computer.
Congrats! You just updated your Galaxy S3 GT-I9300 to Android 4.3 Jelly Bean firmware. Go to Settings > About device to verify this firmware update.

Fix Boot Loop Issue On Galaxy S3 GT-I9300

If Galaxy S3 GT-I9300 stuck at booting animation for more than 10 minutes after Step 11 then follow below instructions:
  • Go to recovery mode. To do so, press and hold the Volume Up, Home and Power buttons together.
  • Now perform Wipe data/Factory Reset and Wipe Cache Partition task before selecting reboot system now function. In recovery mode use Volume keys to navigate between options and Power key to select the option.
Please note, performing wiping task will erase your device internal memory data and not external SD card data.
That’s it! Let us know about your latest Android 4.3 Jelly Bean experience.  visit and get more info ....

Friday, 10 January 2014

How To Install UBUAML2 Android 4.2.2 Jelly Bean Firmware on Galaxy Mega 5.8 I9150 Guide

Samsung launches Android 4.2.2 UBUAML2 official firmware update for the Galaxy mega Jelly Bean 5.8 GT - I9150. The firmware update is launched in various countries in the region including Argentina Brazil and Colombia, and also can be downloaded for manual updates. You can also update your device firmware via Kies or OTA update. Because the device comes with Android 4.2.2 Jelly Bean out of the box, this new firmware update just brings bug fixes and performance tweaks. Continue reading this guide to learn how to get an official stock I9150UBUAML2 Jelly Bean Android 4.2.2 firmware running on the Galaxy mega 5.8 GT - I9150.

Warning: 

This tutorial is only for Galaxy Mega 5.8 GT-I9150. Don’t try this guide on any other Android device. Also, we (True Android Team) are not responsible for any damage caused due to the instruction given in this page. Try this at your own risk. However, it is very unlikely that your device will be damaged if you follow all the instructions as it is which are mentioned in procedure.


Pre Requisites:

Though official firmware restore all existing data but we recommend to back up your data first before proceeding to avoid any uncomfortable situation such as bootloop fix.

  • Backup your device data. You can follow our ultimate backup guide.
  • Make sure your device have at least 60% battery power. You can install an app like Battery Notifier BT Free on your Android device to check it easily.
  • You already have USB Driver Installed for Galaxy Mega 5.8 GT-I9150 in your PC. [Download USB Drivers]
  • Make sure USB Debugging is enabled otherwise you won’t able to transfer file between PC and Galaxy Mega 5.8 GT-I9150. Guide

How To Update Galaxy Mega 5.8 GT-I9150 via OTA

  1. First of all make sure you have stable internet connection (Wi-Fi or data network) on your device.
  2. Now, go to Android app drawer and then select Settings.
  3. Then locate About Device and tap on it.
  4. Next select Software update from About device screen.
  5. Then tap on Update option.
  6. You should see an update, press OK to download and install. (Remember, download using 3G or network data will incur additional charges to your phone bill!)
  7. Soon your device will reboot to complete the installation process.
If you see “The latest update have already been installed” massage while checking update then your device yet to receive an OTA update. Check back within few days or jump to next procedure.

How To Update Galaxy Mega 5.8 GT-I9150 via Kies
  1. Make sure you have stable internet connection on your computer.
  2. Now download and install Samsung Kies on your computer.
  3. Turn on your device (if it off) and then connect it to computer with USB cable.
  4. Run Samsung Kies and wait for it to detect your device.
  5. You should see a New Firmware Upgrade is available at Samsung Kies home screen.
  6. Press the Firmware Upgrade button to proceed.
  7. Follow on screen instruction and soon you will see your device running upgrade and reboot automatically. Once done, you can disconnect your device from computer.
Again! If you see “This is the latest firmware” in Samsung Kies, then your device yet to receive the latest update on Kies. Its good time to go for manual update instruction that located below.

[Note: You can install any firmware listed below despite availability in other countries, except those which comes with carrier name.]


I9150UBUAML2 Android 4.2.2 Jelly Bean Firmware Downloads


How To Install I9150UBUAML2 Android 4.2.2 Jelly Bean On Galaxy Mega 5.8 GT-I9150 Manually
  1. Download Odin v3.09.
  2. Extract Firmware zip file that you downloaded earlier from above link, you will get a .tar.md5 file and some other files (optional).
  3. Extract Odin zip file and you will get Odin3 v3.09.exe along with few other files.
  4. Power off your Android device. Wait 5-6 seconds for vibration to confirm complete switch off.
  5. Now, put the Galaxy Mega 5.8 GT-I9150 in Download Mode by pressing and holding down the Home &Volume Down button together while pressing the Power button. A warning screen will come up; press Volume Up button to enter Download Mode.
  6. Now run Odin3 v3.09.exe (see Step 3) as an Administrator because Admin privileges is required to complete the process smoothly (only applicable Windows Vista and higher).
  7. Now connect your device to your PC using USB cable. An “Added!!” massage will appear in Odin’s message box. If you don’t get the same then you should try another USB port (try USB port located in back in your desktop PC). If that too don’t work then you should reinstall the driver. If you successfully see the “Added!!” message in Odin then you are ready to go in next step. You should also see COM port with a number in Yellow if you successfully added your device.
  8. Click the AP Button, and select that .tar.md5 file that you get in Step 2. If you are using old Odin then add the file to PDA button.
  9. In Odin window, make sure only Auto Reboot and F. Reset Time checkboxes are selected.
  10. Double check everything that we mentioned in Step 8 & Step 9 above. Now, once satisfied hit the START button to begin the flashing process.
  11. Once flashing completed, your Galaxy Mega 5.8 GT-I9150 will restart and soon you will see a PASS message with green background in the left-most box at the very top of the Odin. You can now unplug the USB cable to disconnect your device from computer.
Congrats! You just updated your Galaxy Mega 5.8 GT-I9150 to Android 4.2.2 Jelly Bean firmware. Go to Settings > About device to verify this firmware update.

Fix Boot Loop Issue On Galaxy Mega 5.8 GT-I9150

If Galaxy Mega 5.8 GT-I9150 stuck at booting animation for more than 10 minutes after Step 11 then follow below instructions:
  1. Go to recovery mode. To do so, press and hold the Volume Up, Home and Power buttons together.
  2. Now perform Wipe data/Factory Reset and Wipe Cache Partition task before selecting reboot system now function. In recovery mode use Volume keys to navigate between options and Power key to select the option

Please note, performing wiping task will erase your device internal memory data and not external SD card data.

That’s it! Let us know about your latest Android 4.2.2 Jelly Bean experience.